⚠️ Important Notice: As of WordPress 6.3, Reusable blocks are being renamed as Synced patterns. Any previously made Reusable blocks will continue to function as they do now, just under the new Synced pattern name.
What are WordPress reusable blocks?
WordPress reusable blocks are a feature introduced in the WordPress Gutenberg editor that allows users to create and save content blocks for reuse across multiple posts and pages. Instead of recreating the same content or layout each time you want to use it, you can save a block as “reusable” and then easily insert it wherever needed.
Common Uses for WordPress Reusable Blocks
- Call-to-Action (CTA) Blocks: If you have a specific call-to-action that you use across multiple pages or posts (e.g., a newsletter signup form, a promotional banner), creating a reusable block allows you to easily insert and update it in various locations.
- Testimonials: If you frequently display customer testimonials or reviews on different pages, creating a reusable block for testimonials allows you to maintain consistency and update the content centrally.
- Contact Information: Reusable blocks are handy for displaying consistent contact information, such as your business address, phone number, or email, across your website. If this information changes, you only need to update it in one place.
- Alerts or Notices: If you need to display important alerts, notices, or announcements on multiple pages, creating a reusable block for this content ensures that updates are reflected everywhere.
- Custom Content Layouts: If you have a specific content layout (e.g., a two-column design with images and text) that you want to use consistently, save it as a reusable block. This is especially useful for maintaining a cohesive design across your site.
- Promotional Banners: If you run promotions or campaigns with banners that appear on various pages, using reusable blocks simplifies the process of inserting and updating these banners.
- Disclaimers or Legal Information: Reusable blocks can be employed for displaying disclaimers, legal information, or privacy policies uniformly across your site.
- Content Snippets: For frequently used content snippets, like product features, mission statements, or company history, creating reusable blocks ensures consistency and facilitates updates.
- Product Listings or Catalogs: If you have consistent product listings or catalogs on different pages, save the layout as a reusable block for easy replication.
- Event Details: Reusable blocks are beneficial for sharing event details such as date, time, and venue. This ensures that any changes to the event information are automatically updated everywhere.
Reusable blocks are particularly useful for maintaining consistency across your website, especially when you have recurring elements or layouts. They save time and effort by allowing you to manage and update content in a centralized manner.
How to Create a Reusable Block in WordPress
All Gutenberg blocks serve as individual content elements within the WordPress editor, offering the flexibility to be saved as reusable blocks.
To begin creating a reusable block, open an existing or new post in the block editor. Click the ‘+’ button located in the top left corner of the screen to access the block menu.
Within the block menu, you can drag and drop the desired block that you intend to reuse across multiple pages or posts. For the purpose of this tutorial, let’s select the ‘Paragraph’ block to create a reusable block for a Call-to-Action (CTA) content snippet.
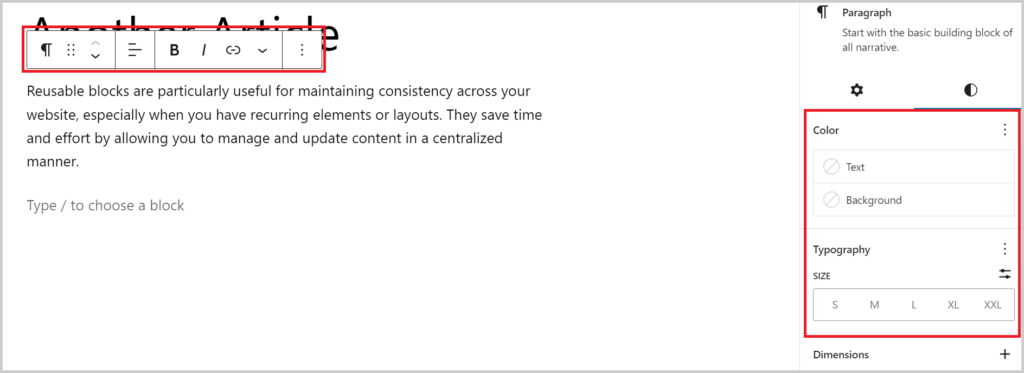
Following the insertion of the block, proceed to add the content you wish to reuse. Enhance the style of your block by utilizing various options available in the block toolbar at the top or by accessing the block panel in the right corner of the screen.
Upon completing your edits, click on the three-dot menu button located in the block toolbar. A dropdown menu will appear, and within it, choose the ‘Create Pattern’ option. This step is pivotal in converting your customized content into a reusable block for seamless future integration.
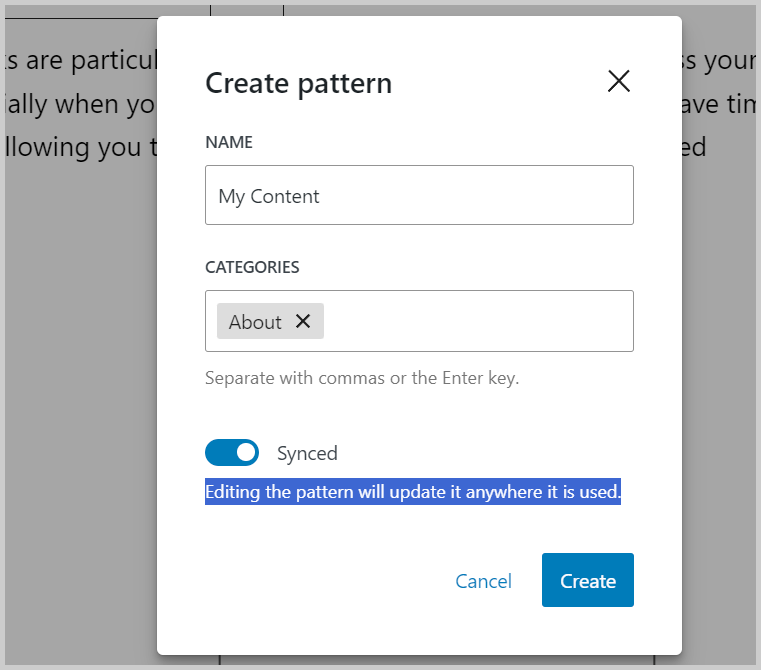
Next, you will be asked to enter a name for the reusable block. We recommend using a name that helps you quickly identify the block and what it does. After that, just click the ‘Save’ button to store your settings.
*The “Synced” toggle: this will synced the block include setting at anywhere you used it.
Your reusable block will now be saved in the WordPress database with all its settings.
How to add WordPress Reusable Blocks in Posts and Pages
Now that we’ve covered creating reusable blocks in WordPress, let’s explore how to incorporate them into your posts and pages.
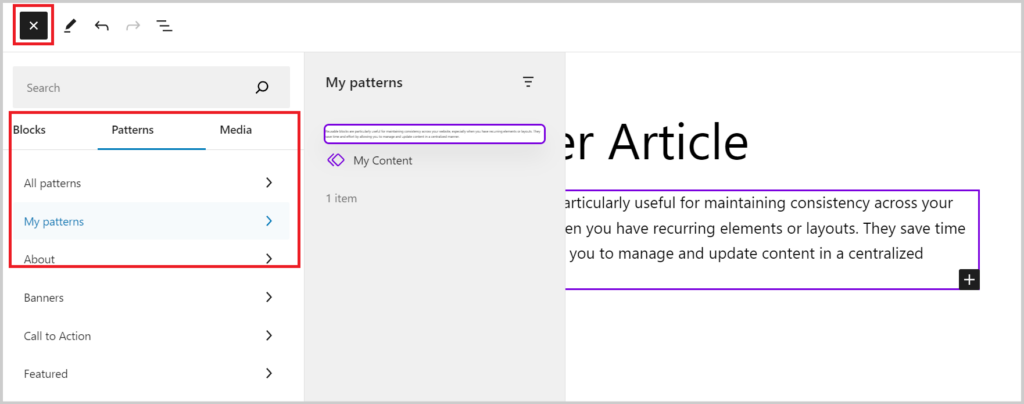
Begin by opening a new or existing post in the Gutenberg editor. Click the ‘+’ button in the top left corner of the screen, and navigate to the ‘Pattern’ tab at the top of the block menu.
In this tab, you’ll find a panel showcasing all the reusable blocks you’ve created. If you have numerous reusable blocks, you can efficiently locate a specific one by typing its name in the search box.

Proceed by clicking on the desired reusable block to seamlessly insert it into your post. For further modifications, utilize the settings available in the block toolbar or the block sidebar on the right.
It’s important to note that adjustments made to the reusable block’s settings will be reflected across all instances where it’s used. If you wish to make changes specific to this post alone, you must first convert it to a regular block. To achieve this, click on the ‘Detach pattern’ icon within the block toolbar at the top. This ensures that alterations remain exclusive to the current post.
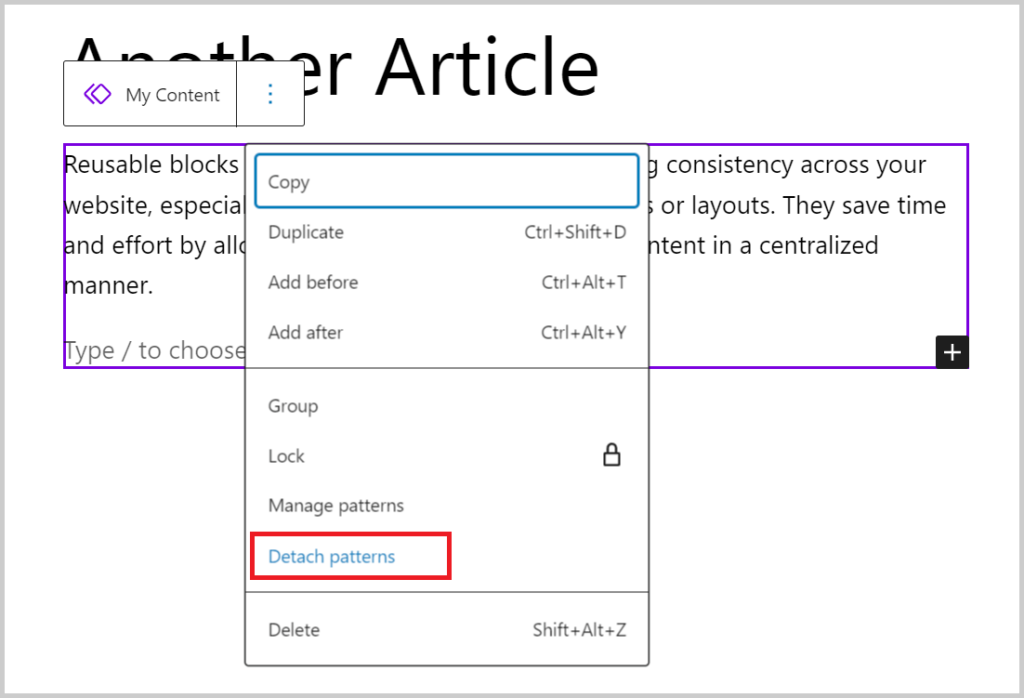
This will convert your reusable block into a regular one, and you can make changes to it without affecting the original block.
Managing All Reusable Blocks
After utilizing reusable blocks for some time, you might accumulate blocks that are no longer needed or require renaming. Thankfully, the Gutenberg editor simplifies the management of all your reusable blocks.
Navigate to top right, click on the “Three Dot“, this will open the option pop-up, then select “Manage patterns”.
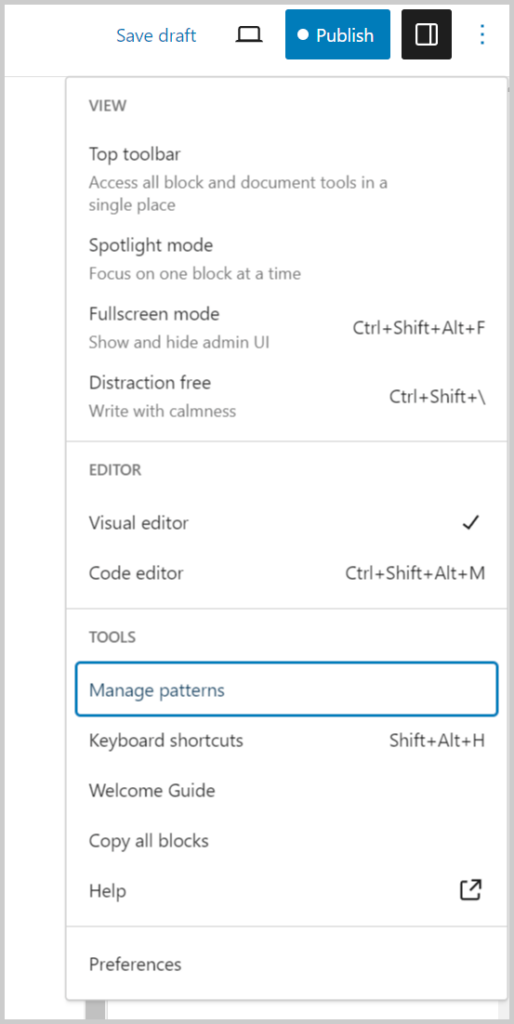
This will direct you to the Pattern page, where you can easily manage all the reusable/pattern blocks features on your WordPress website.
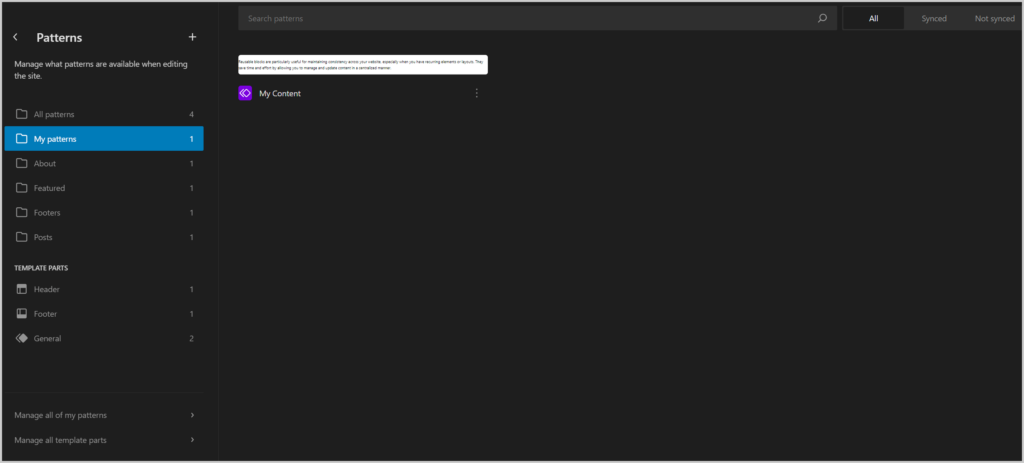
Here, you can edit, rename, delete, import, or even export your blocks to another website.
How to Import / Export Reusable Blocks
Reusable blocks in WordPress offer the advantage of being transferable not only within the website where they were created but also across different WordPress websites.
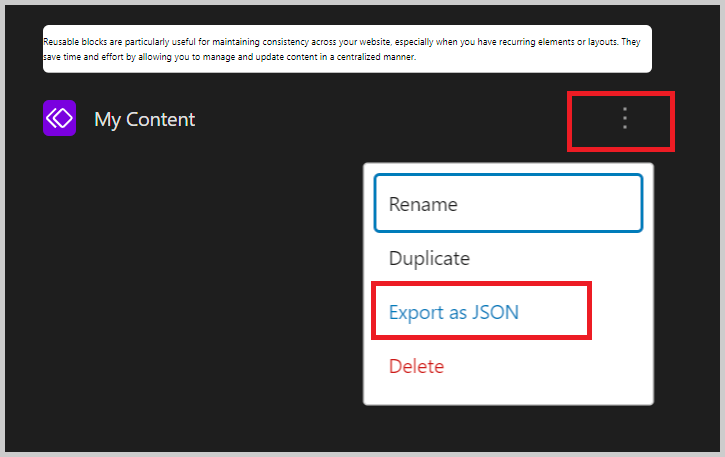
To export a reusable block, navigate to the Reusable Blocks page and click the ‘Export as JSON’ link beneath the desired block. WordPress will generate a JSON file containing the block’s information, which can then be saved on your computer.
This feature enables you to share and utilize your custom blocks seamlessly across various WordPress sites, promoting consistency and efficiency in content creation.
You can now switch to another WordPress site’s admin area. From here, visit the block management screen to view the reusable block options.
Next, click on the ‘Import from JSON’ button at the top.
This will show a file upload box where you must click the ‘Choose file’ button to select the block you downloaded earlier.
After that, click on the ‘Import’ button.
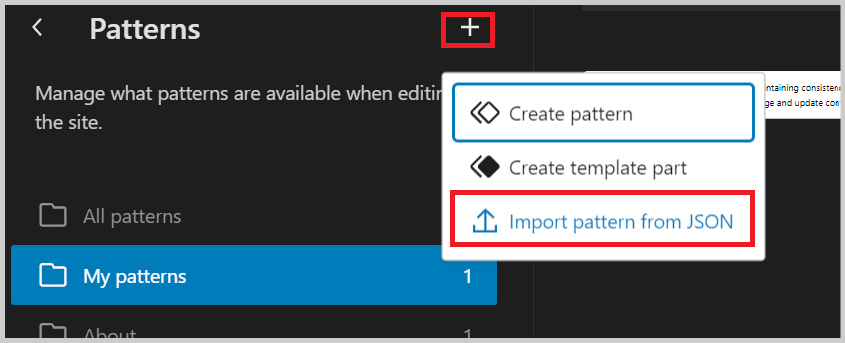
WordPress will now import your reusable block and save it in its database. You can go now ahead and start using the newly imported reusable blocks on your other WordPress website.
We hope this article helped you learn how to create a reusable block in the WordPress block editor.
