A multisite network is a collection of sites that all share the same WordPress installation core files, plugins and themes. The individual sites in the network do not have their own directories on your server, they do have separate directories for media uploads within the shared installation, and have separate tables in the database.
Content:
1.Preparation
2.Setup
3.Network Setting
4.Adding New Sites
5.Adding New Users
6.Adding Themes and Plugins
WordPress Multisite Install Preparation
Your existing WordPress site will be updated when creating a network. So backup your database and files.
Deactivate all active plugins. You can reactivate them again after the network is created.
To enable Multisite, connect to your site using a FTP client or cPanel file manager, and look for the wp-config.php file in WordPress root folder.
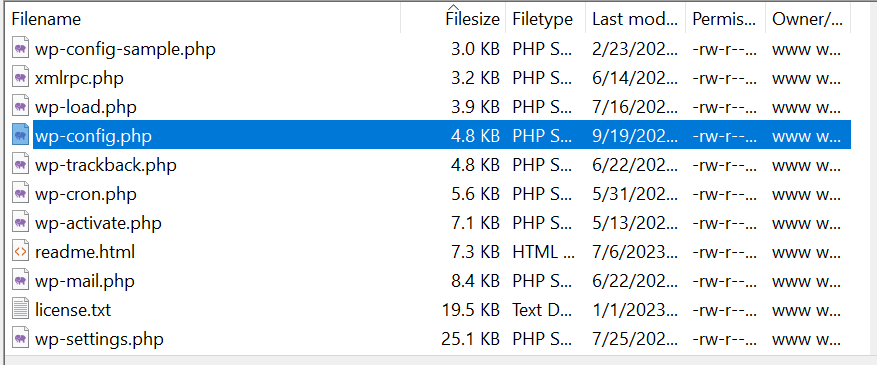
Open up wp-config.php and add this line of code above where it says /* That's all, stop editing! Happy publishing. */. If it doesn’t has that, then add the line somewhere above the first line that begins with require or include:
define( 'WP_ALLOW_MULTISITE', true );
Then save and upload your wp-config.php file back to the server. You will need to refresh your browser to continue.
WordPress Multisite Setup
You can now go to Tools » Network Setup page to configure your multisite network.
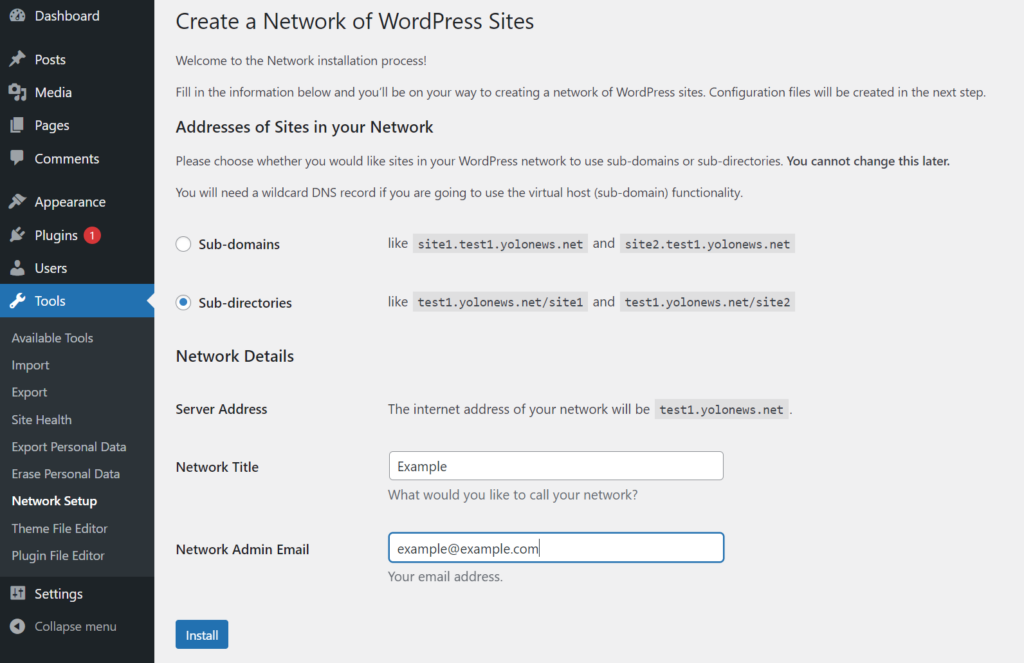
- Sub-domains — A domain-based network in which on-demand sites use subdomains.
- Sub-directories — A path-based network in which on-demand sites use paths.
If you choose sub-domain for you network, you’ll also need to configure wildcard DNS.
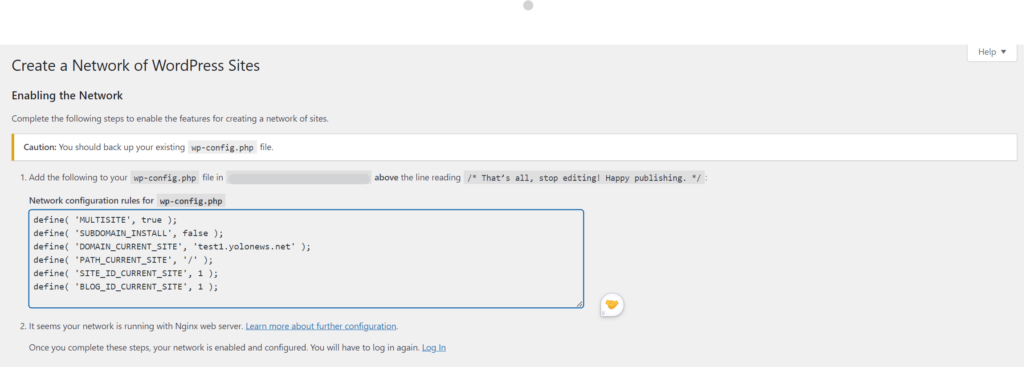
Open up wp-config.php and add this line of code above where it says /* That's all, stop editing! Happy publishing. */. If it doesn’t has that, then add the line somewhere above the first line that begins with require or include:
define( 'SUBDOMAIN_INSTALL', false );
define( 'DOMAIN_CURRENT_SITE', 'domain.com' );
define( 'PATH_CURRENT_SITE', '/' );
define( 'SITE_ID_CURRENT_SITE', 1 );
define( 'BLOG_ID_CURRENT_SITE', 1 );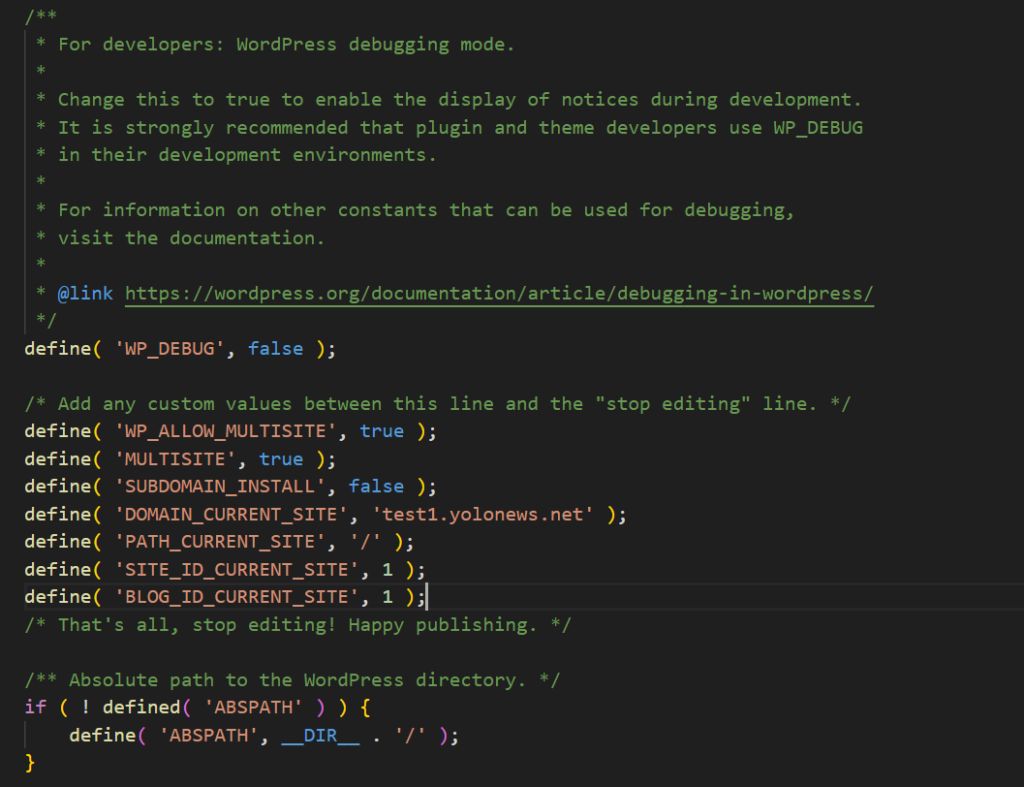
After completing these steps, you need to login again.
Multisite Network Setting
After you have setup the multisite network, it is time to configure network settings.
You need to go to the Network Dashboard to change network settings, add new sites, and configure other settings.
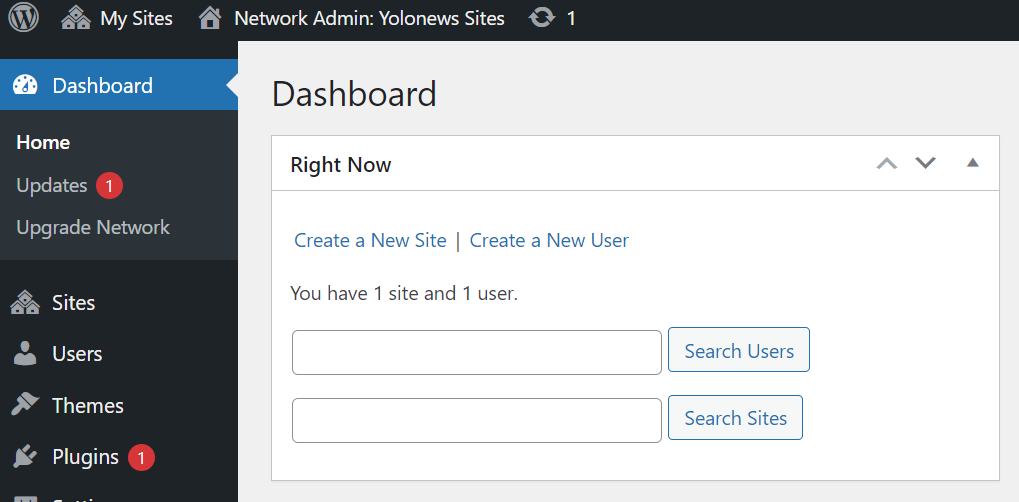
Go to My Sites » Network Admin » Dashboard.
The Right Now dashboard widget allows you to create a new site and add new users.
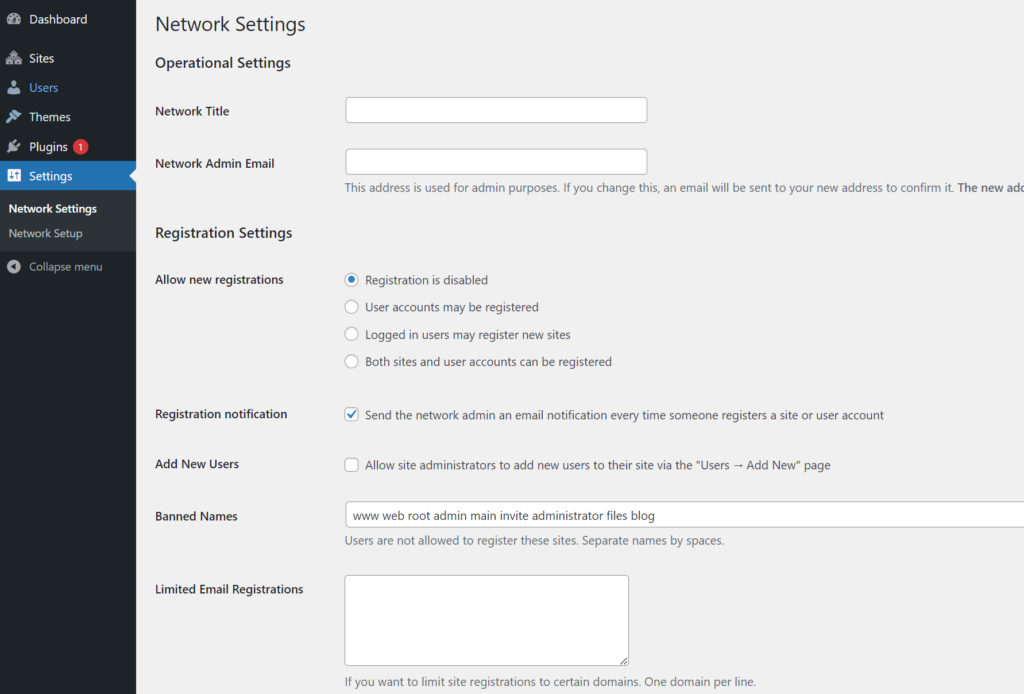
To configure network settings, you need to go to the Settings in the admin sidebar.
Adding New Sites to Your WordPress Multisite Network
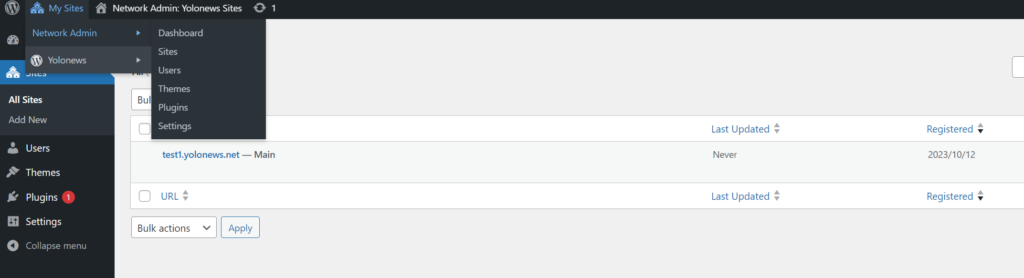
To add a new site to your WordPress multisite network, click on My Sites » Network Admin » Sites in the admin toolbar.
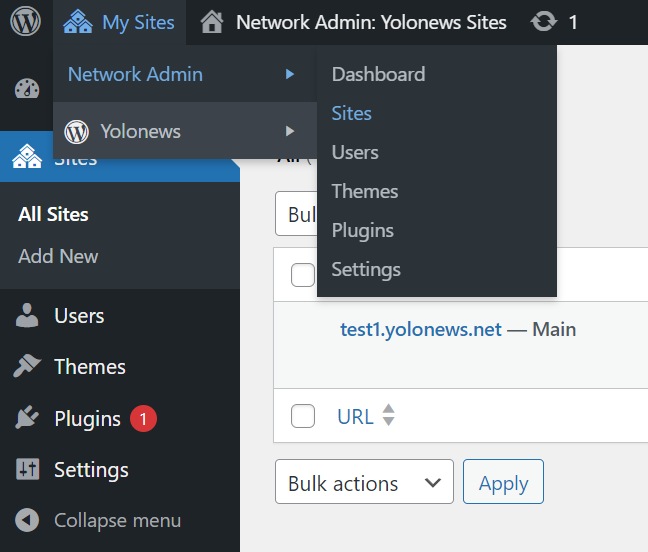
click on the Add New button at the top.

On the Add New Site page, fill up the
Site Address (URL)
Site Title
Site Language
Admin Email
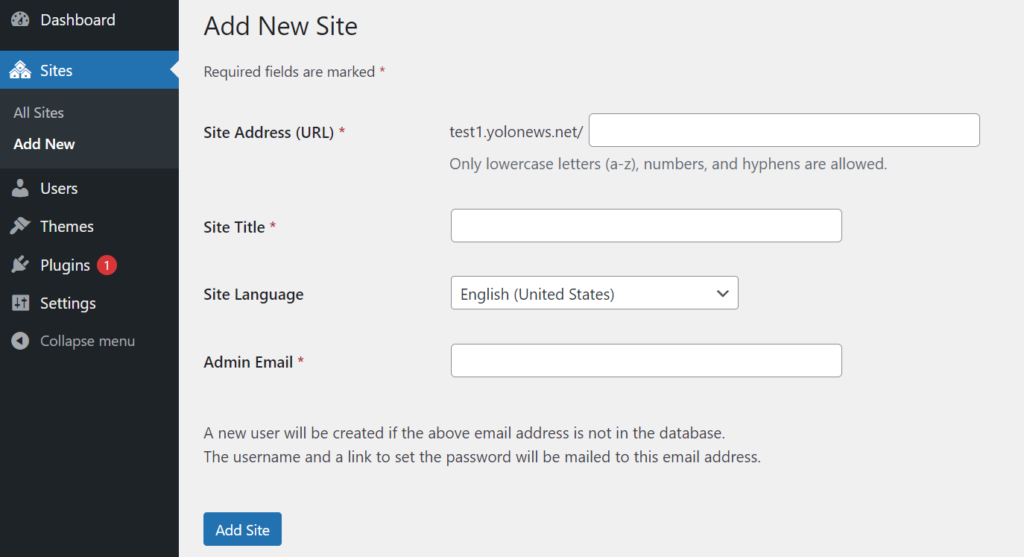
Once you are done, click on the ‘Add Site’ button.
Adding New User to Your WordPress Multisite Network
To add a new user to your WordPress multisite network, click on Users menu in the admin toolbar.
Then click on the Add New button at the top.
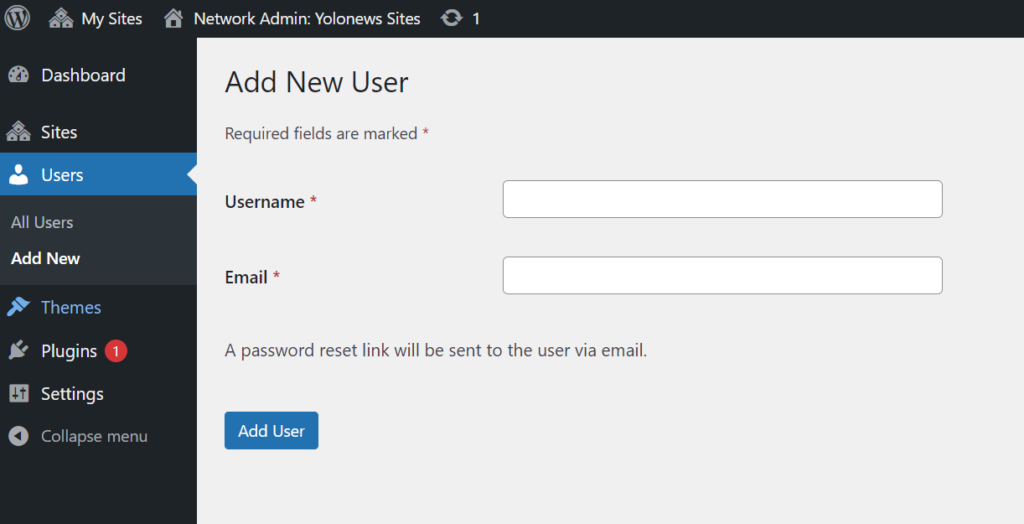
Fill up the Username and Email
Adding Themes and Plugins to Your WordPress Multisite Network
By default, individual site administrators cannot install themes and plugins on their own.
So you need to install the themes and plugins as network admin.
To add themes, go to My Sites » Network Admin » Themes page.
Click Add New:

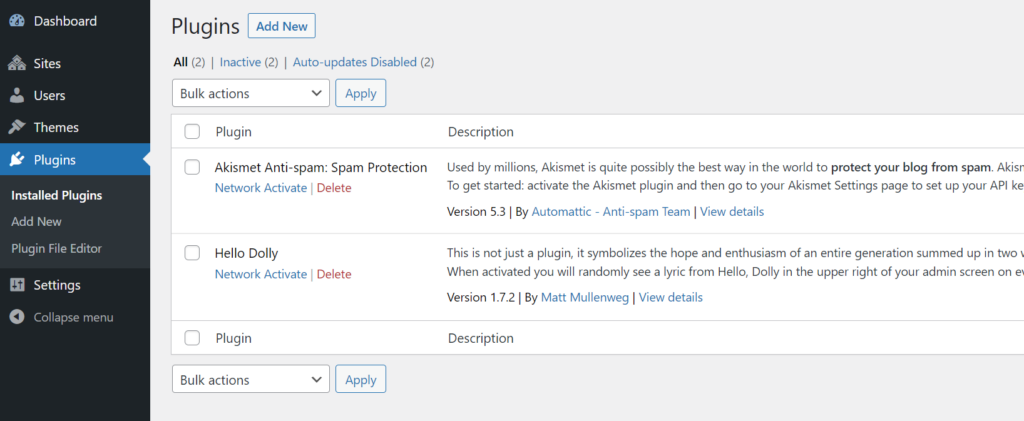
To add plugin, go to My Sites » Network Admin » Plugins page.
Click Add New:
We hope this article helped you learn how to install and setup WordPress multisite network.